Hi all!
I usually don't say to a product I like it or not, especially if I don't have any concerned in it. But I have to say I'm really happy to used the AK new Extreme metal set. I always use the Gunze colors to painting, but somehow the Gunze couldn't give back the right colors what I needed for. So here are the shells first with black base colors, then the extreme metals. There will be one more color over the aluminum which will be grey. Let's see the colors on photos.
Helló mindenki!
Általában nem mondom azt egy márkára hogy szeretem vagy nem. De azt kell mondjam nagyön örülök, hogy az AK új extrém fém színeit használhattam. Sajnos a gunze hasonló színei nem tudják visszaadni azt amire szükségem volt. Tehát jöjjenek a képek, először a fényes fekete alapozóval, majd a fém színekkel. Lesz még egy szín az alumínium szín felett, ez pedig szürke lesz majd, de először a fotók.
1/35th scale AFV by Gergo Szaszko & 1/48th scale Aircraft by Milan Tusai's modeller blog
My actual works
- T-62 Chechnya (26)
- T-72 Chechnyan War (25)
- T-34/76 Großdeutschland (9)
- M3 GMC Half-track in DAK service (6)
- T-55 Serbian army Kosovo (5)
- BTR 80 Ukrainian civil war 2014-15 (3)
- Mig-21 MF (3)
- A-10 Thunderbolt II (1)
- Hellenic Falcon (1)
- MiG-23 MF (1)
- Mig-29 (red 44) (1)
- Shot Kal (1)
- T-64 (1)
Showing posts with label T-62 Chechnya. Show all posts
Showing posts with label T-62 Chechnya. Show all posts
Monday, 15 February 2016
Saturday, 13 February 2016
bags
Hi all!
Today I finished the bags' shape. It was a very easy job, needed only water, wood cement, an tissue. The base was the A+B putty, than just covered with the tissue. That's all, the texture is ready, let's see how we can paint it.
Helló!
Ma sikerült befejeznem a zsákokat. Ehhez nem volt másra szükség csak papírzsebkendőre és fa ragasztóra, no meg némi vízre. Az alap a már korábban elkészített A+B putty-s műgyanta, amit ezzel a zsebkendővel borítottam be. Lássuk milyen lesz a festése.
Monday, 8 February 2016
90%
Hello all!
I think I've never been so close to finish to this T as now. I'm not 100% satisfied by the result of the dried mud and wet mud combination, but still working on it. I needed to stop in this 90% stage because I want to see how looks like together the base and the bags with figure or figures. The final touches comes after this moment. Until that, here comes the photos of the current stage.
Helló mindenki!
Azt hiszem sosem jártam még ilyen közel ahhoz hogy befejezhesem ezt a 62-est. Nem vagyok 100%-ig elégedett azzal ahogyan a száradt sár és a nedves sár egymással összhangban vannak, de még dolgozom rajta. Meg kellett hogy álljak ebben az állapotában a koszolásnak, mert a végső simításokat csak akkor akarom majd elvégezni amikor a dioráma alap is elkészült, illetve a zsákok és a figura is a helyére kerültek. De addig is íme pár fotó az aktuális állapotról.

Saturday, 30 January 2016
First steps of mud
Hi everybody!
Today I made the first steps of mud on rollers. The first step should be always the dried mud effect. For me of course, maybe you start different way, who knows. The next layer will be the fresh mud, and than need some mix of both. And the final touch will be the splash and dark spots, like oil or dirt. But now, here is a first two shot....
Helló mindenki!
Ma megcsináltam az első sarazós lépéseket. Ma csak az első megszáradt sár réteg került rá amit követni fog még egy friss sár réteg majd a kettő keveréke, illetve fröccsenések, megfolyások. De először a képek az első lépésről....
Thursday, 28 January 2016
turret nearly done
Hi!
One step again closer to finish this beauty. Yesterday night I finished the light dust effect on turret, and now only left the dirt of the personal use like spots and water marks oil marks. I hope it will be done at weekend!
Helló!
Egy lépéssel megint közelebb a befejezéshez! Tegnap éjszaka elkészült a finim por megülés a törnyon, így nem maradt más hátra mint a normál napi használatnak a nyomai, mint apró foltok, kis megfolyások. Remélem a hétvégén elkészülhetek vele.
Wednesday, 27 January 2016
chipping
hi all!
Chipping has done. I know it seems too "high color" at the moment, but after the next layer of smooth dust will be real chipping color (I hope so :D ) I hope I will have some time at the weekend and I can finish the soft dust on turret.
Helló mindenki!
A lepattogzódást befejezettnek tekintem. Tudom most még elég élénkek a színek, de a következő finom rétegű por kosz felhordása után szépen vissza fog tompulni. Remélem hétvégén lesz egy kis időm befejezni ezt a műveletet a tornyon.
Monday, 25 January 2016
rain stream
Hi all!
After the pin wash finally I could start the rain stream, which is the first step to chipping. This two method it takes a really long time, but the result will manipulate the dust in final stage.
Hello mindenki!
Végre a befolyatások után sikerült elkezdenem a koszolást az eső nyomok imitálásával, ami az előszobája a lepattogzódásoknak. Ez a két folyamat roppant időigényes, de ez a két folyamat határozza ameg a kosz végső formáját!
Cheers
Gergo
Saturday, 23 January 2016
start to make the base
I jus added the pin wash, and started to make the base of the diorama. One thing is sure, I have enough shell :D
Megcsináltam a befolyatásokat, valamint elkezdtem foglalkozni a dioráma alapjával is. Egy dolog már most biztos, van elég lőszer hüvelyem :D
Megcsináltam a befolyatásokat, valamint elkezdtem foglalkozni a dioráma alapjával is. Egy dolog már most biztos, van elég lőszer hüvelyem :D
Monday, 11 January 2016
hairspray with sponge
I was playin' with techniques today. Yesterday I sprayed the camo on it
and used the hairspray technique to get back some colors, but I just
wasn't really satisfied. Today I was working over it with sponge and
basic color, and now looks much much better! Now she is ready to nice
weathering.
Tuesday, 22 April 2014
The final colors
Hi all!
I think this is my final colors on her. I tried before other colours, but somehow, just didn't like it.
This colour were mixed from Gunze olive green, and light green in 9:1 ration. After that with hairspray solution came the light green which was from Gunze interior green, with yellow, and white in 7:2:1
And she's got the first pin wash and flat clear. The pin wash is really rude at the moment, but of course I will work on it!
Hello mindenki!
Azt hiszem megszületett a végső szín kombináció. Sok verziót fújtam már rá, de valahogy nem tetszettek.
Ezek a színek a Gunze Olive zöldjéből, halvány zöldjéből lettek kikeverve 9:1 arányban. Ezután hajlakk technikával került fel a világos zöld foltozás, Gunze "belső" zöld, sárga, és fehér keverékéből 7:2:1 arányban.
Megkapta a filterezést, és az első befolyatás réteget is. Valamint a matt lakkot is. Tudom a befolyatás még nagyon durva, ezen azért még dolgozni fogok!
Thanks for watching!
Cheers
Gergo
Thursday, 21 June 2012
Hi everyone!
Sorry for the long silence, but I had a very busy half a year, get a new job, far away, gat a new flat, move out, move in, all my staff in separate boxes. So the faith wasn't kind with me about modelling in the last few months. Anyway couple of weeks ago, I could start again, and finaly I could finish it until the painting job. Not everything is done, but the most of the parts are ready. SO come and let see my beast at last before paint.
Cheers
Gergo
Monday, 9 January 2012
near to the painting job
Hi all,
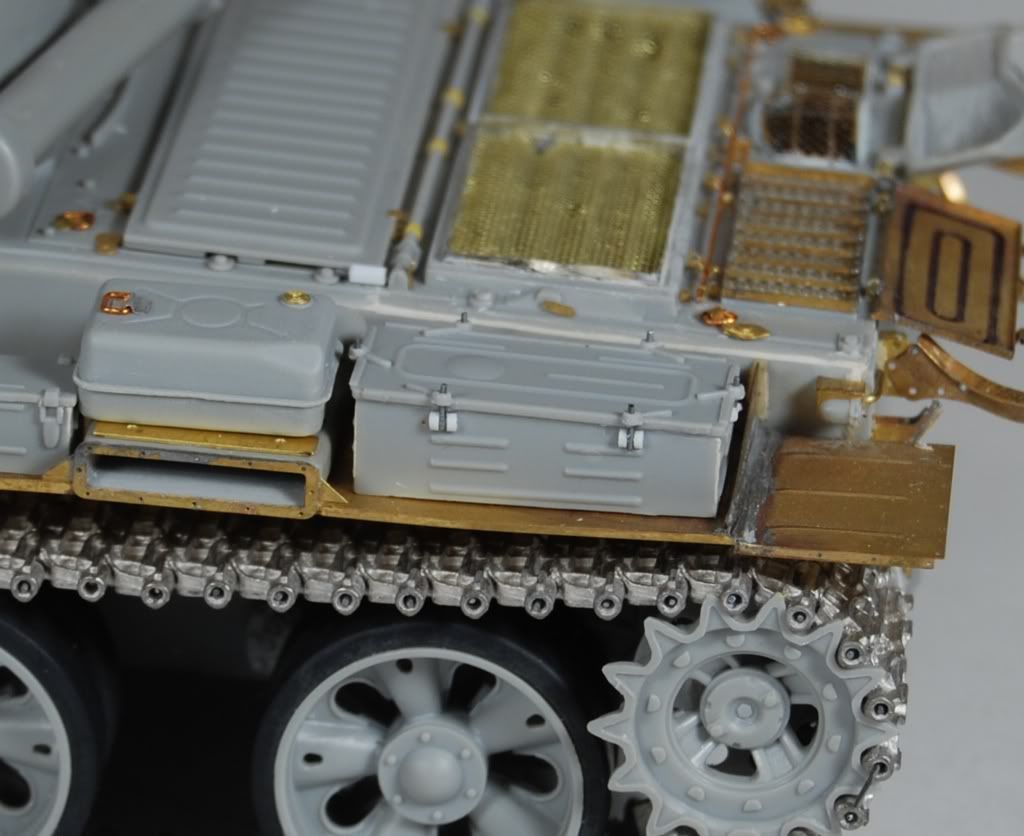
I had a spare time to do something on my modell before my holiday. So I finished yesterday the engine deck, and I started to do the side boxes. Unfortunately the E.T. models doesn't give any update for those boxes (I think that is business politic to buy the boxes P.E. as well) I think the Trumpeter's orogonal boxes are not too bad. I know you will have a lot work with that, but I don't think that we should buy a whole P.E. set to use, except if you want to use open boxes, or damaged boxes!
So today I've just already started, but tomorrow will finish it, so now only one photo is coming from that.
The holders will be ready from old P.E. sets, or something what left from old kits. I don't know yet.
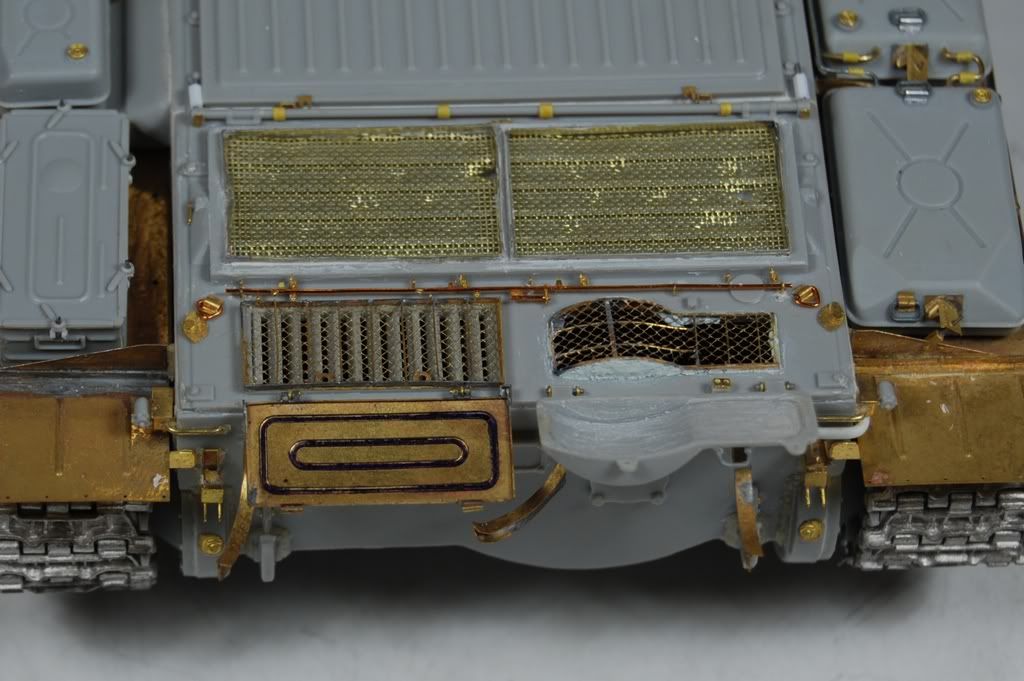
I also finished the engine deck, what was a nightmare!!!!!! The Trumpeter completly forget the details about this side! Like a toy. So I had to looking for many many reference photos and start to build a new opener section. The photo is not the best, but tomorrow will fallow a good one!
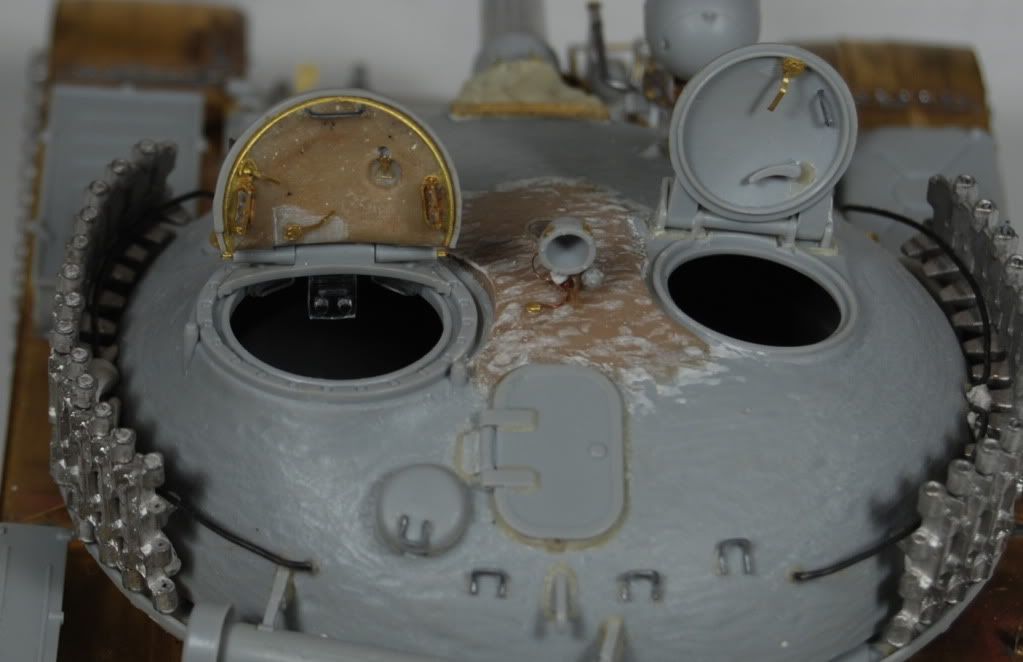
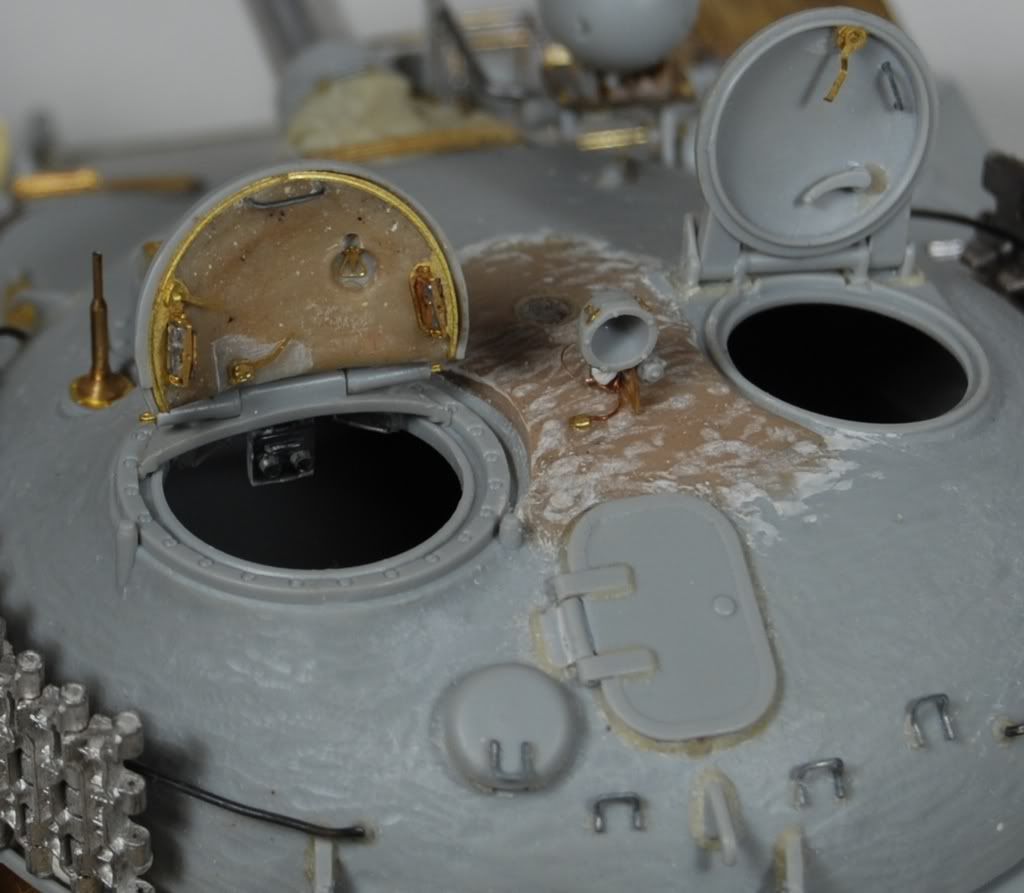
And finaly ready the commanders hatch. loads of P.E. work and a bit home made things. Now looks like the real one. Some smale update is still missing but tomorrow will be completed!
So see you tomorrow with more updates!
Cheers: Gergo
Subscribe to:
Posts (Atom)


